Least Resistance Training Concepts
(LRTC)

Volunteers Training for Emergencies

  LRTC Emergency Response Team
INFORMATION SHEET

Overturned Vehicle Stabilization
Part Two

Please note: This feature is a continuation from Part One in which critical safety issues are discussed.


Initial size-up of the overturned trailer should include such issues as assessing structural integrity, addressing physical hazards and determining the stability of the trailer in its current position. It is not a safe practice to attempt an extrication if the trailer may rock or shift due to the activities taking place or due to the movement of the animals inside.

Stabilization may involve timbers placed in appropriate positions, utilization of step chocks, and even appropriately rated rescue lines to further reduce motion. Each approach has its advantages and disadvantages that responders should learn through training. Combinations of these equipment types may be needed to ensure the safest operation that is practicable.

Before laddering and entering a trailer, it must be stabilized.

With step chocks that are designed to be safely utilized with the steps facing either up or down (see Part One,) a decision can be made as to which orientation best serves the operation. In some instances one may be facing down to provide better traction while another may be placed face up due to the structural element being supported.

The chock in the foreground is placed face up in order to "cradle" a structural element on this trailer.
The other chock is face down for traction and to allow wedges to be driven above it for added security.

Additional stabilization may still be required by using appropriately rated ropes for tensioning and lumber for cribbing. In our operations, the incident Safety Officer will typically determine that all safety criteria have been met before an overturned vehicle is laddered or entered, and before extrication activities take place.


  Rescue 1 and Rescue 3 Stabilization Gear

In addition to having various lengths of timber and heavy rescue rope, our normal compliment involves two 24 inch step chocks and various wedges.

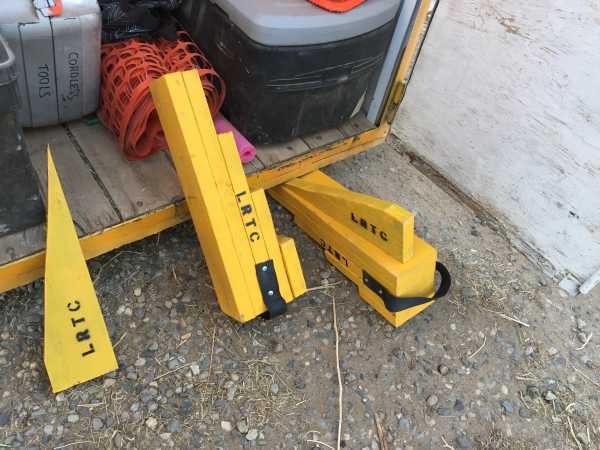
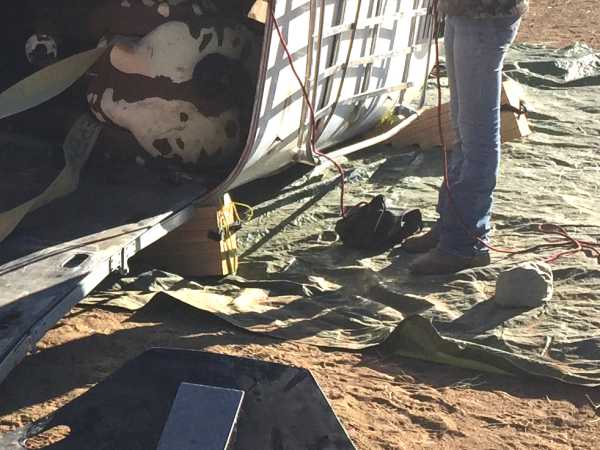
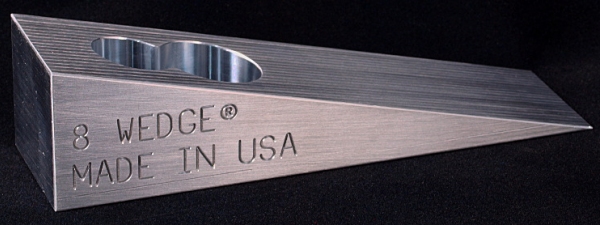
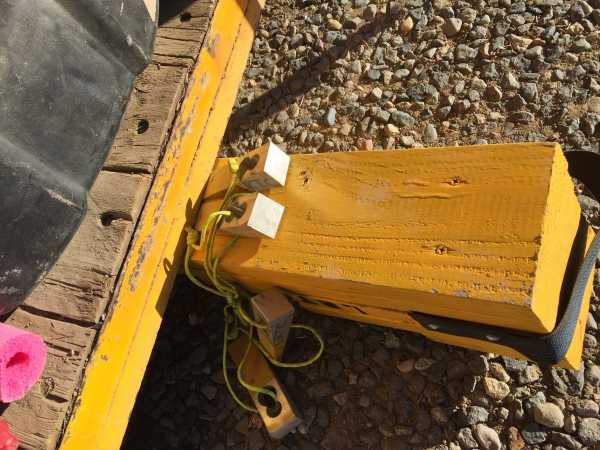
Our "8 Wedges," normally used for forcible entry - prying open jammed doors or gaining purchase points for spreader jaws - can also help fill gaps between step chocks and overturned vehicle bodies.

The "8 Wedge" used by our team.

Normal use with a Halligan tool.

Aluminum 8-Wedges used to tighten up space between a step chock and a metal body structure.


  KEY POINTS

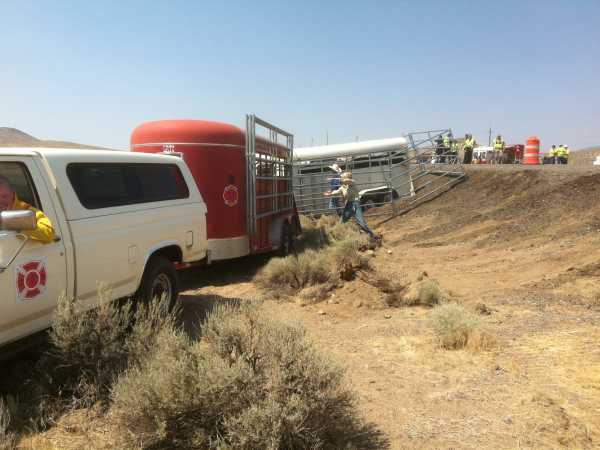
  • Assess the scene. Choose locations for cribbing and step chocks that are likely to provide the most stable support.

  • Surface area is your friend. Maximize surface contact with the ground. Maintain as much surface contact with vehicle elements as may be practicable.

  • Don't overdrive step chocks and wedges under vehicles to the point that doing so compromises surface contact.

  • Obtain more "snug contact" using wedges if appropriate, but be careful that the wedges don't improperly redistribute the load.

  • Use stakes to hold step chocks in place where appropriate when needed to prevent them from creeping out during operations. Flag the stakes with ribbons or mark with cones.

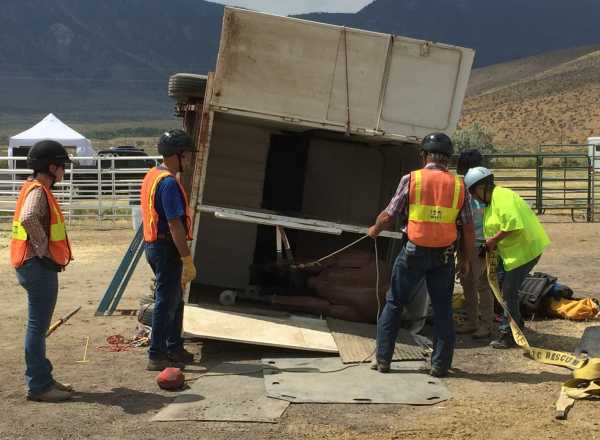
  • Safety check all stabilization gear before laddering or entering the trailer.

  • Recheck and readjust all stabilization gear if an extrication is going to involve a prolonged operation, when cutting and changing the structural characteristics of the trailer, and if the animals shift and alter the trailer's weight distribution.

  • Maintain safety awareness when breaking down the stabilization gear as the vehicle may shift after animals have been removed or if the trailer's integrity has been altered. Safety protocols don't end until the team has packed up and is back in quarters!


Return to Part One


Return to Information Sheets and Resource Guides

Return to Sample Incident Responses

Return to LRTC TLAR / EVAC Page

The training information presented in these information sheets and guides is offered for illustrative and volunteer refresher purposes only. It is not a substitute for actual hands-on training.

Press Back to return to the page which brought you here

Return to LRTC Wild Horse Mentors

Return to KBR Training Page

Go To KBR Horse Net